This is the step by step guide which intends to explain how to create a stop reason that will cancel the currently active automatic stop reason, knonwn as Break1, and change the status from automatic stop reason to production. Which in the graphical history hour will be represented as yellow in our example.
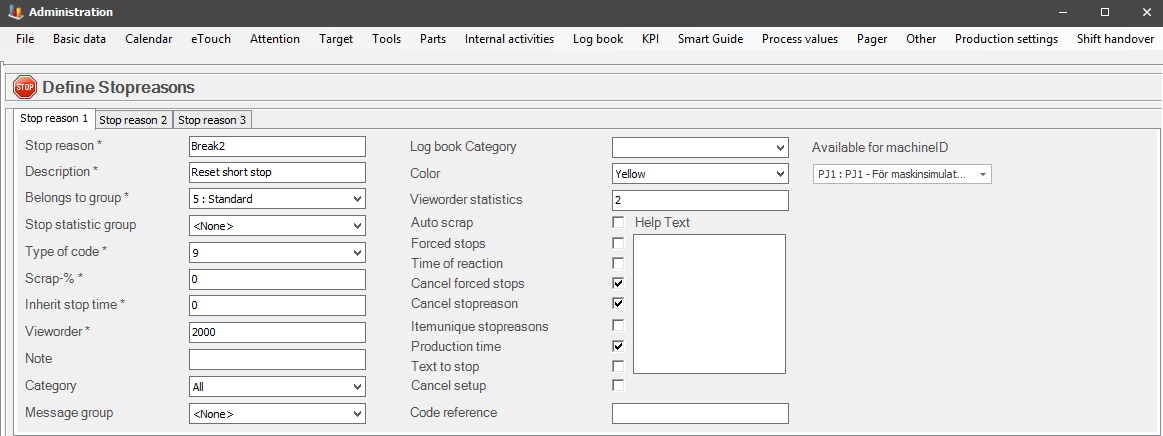
In the first tab for Stop reasons the following is changed.
Stop
reasons: Name of the stop, which is also the same as stop code in the system.
Description: Information about the stop reason, which
in the system is called cause of stop.
Belongs to group: This is used to
sort stop reasons in search criterias, in our example group 5 i
used.
Stop statistic group: Same as above, here in our example none is
selected.
Type of code: 9 since this stop reason i used to reset
Break1.
Scrap %: Not used, but mandatory to enter a value, use
0.
Inerherit stop time: Same as above, enter 0.
View code: Used to
show stop reasons in lists, etc, the higher the number, the higher the stop
reason is on the list.
Category: A search critieria for stop reasons, use
all here.
Message group: This is optional, and can be used but in our
example none is selected.
Color: This is the color the stop reasons
will be visualized with, in our example yellow is selected.
Cancel forced stops: This is used since it will reset
Break1.
Cancel stop reasons: same as above.
Production time: This is
used since the time is considered to be production time.
Available for
machine ID: In this list select the machine/s
that should have the stop reason on
them.
In the second tab for Stop reasons the following is changed.
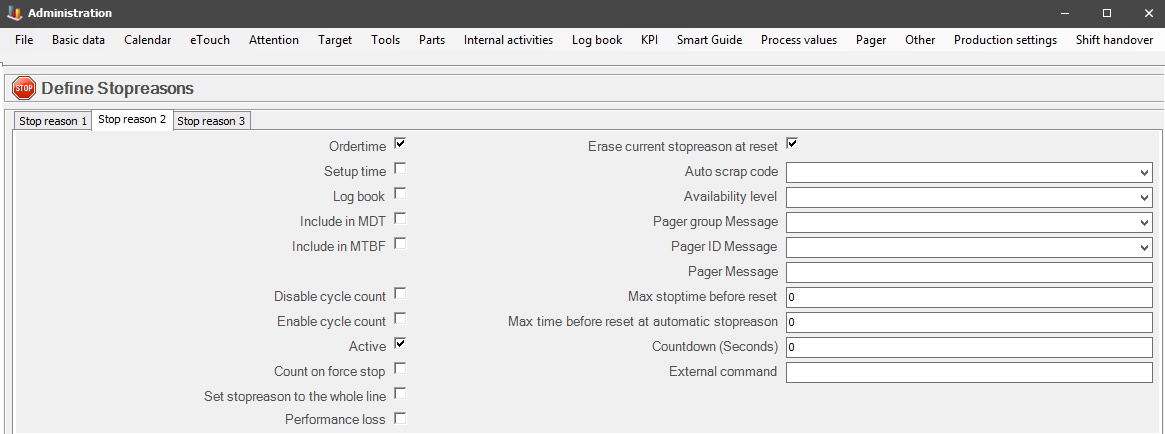
Order time: This is activated,
since this is considred order time in the production.
Active: This is
activated, since it should be possible to select it.
Erase current stop
reason at reset: This is activated since this stop reasons is intended
to reset Break1.
The third and final tab of Stop reasons will not need any changes.