If a brand new calendar has to be extended, a few more steps is needed compared to when you extend an existing calendar.
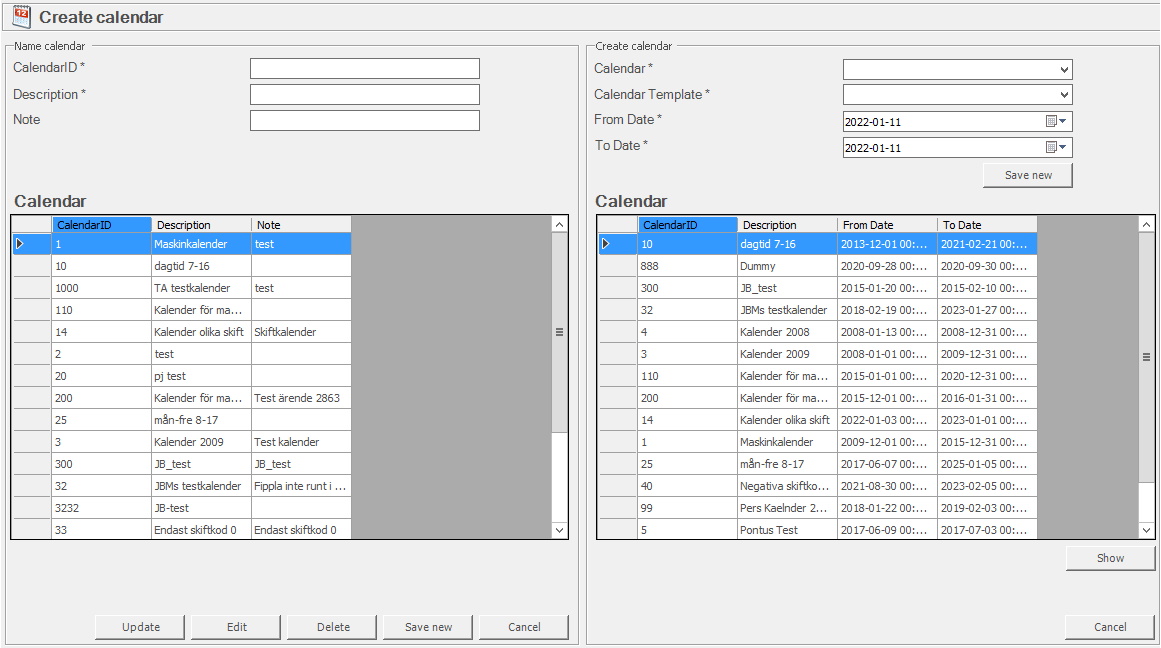
1. Go to "Client" -> "Administration" -> "System settings" -> "Calendar" -> "Create calendar". Here there is more information about how this form works. In that form it is important to know that "CalendarID" HAS TO be numerical. Use "Description" to describe what the calendar is about, and if any additional information is needed use "Note". That field is optional. To confirm use "Save new". Please note that if any letters are used in the field for "CalendarID", the system will show a warning. See the picture below.
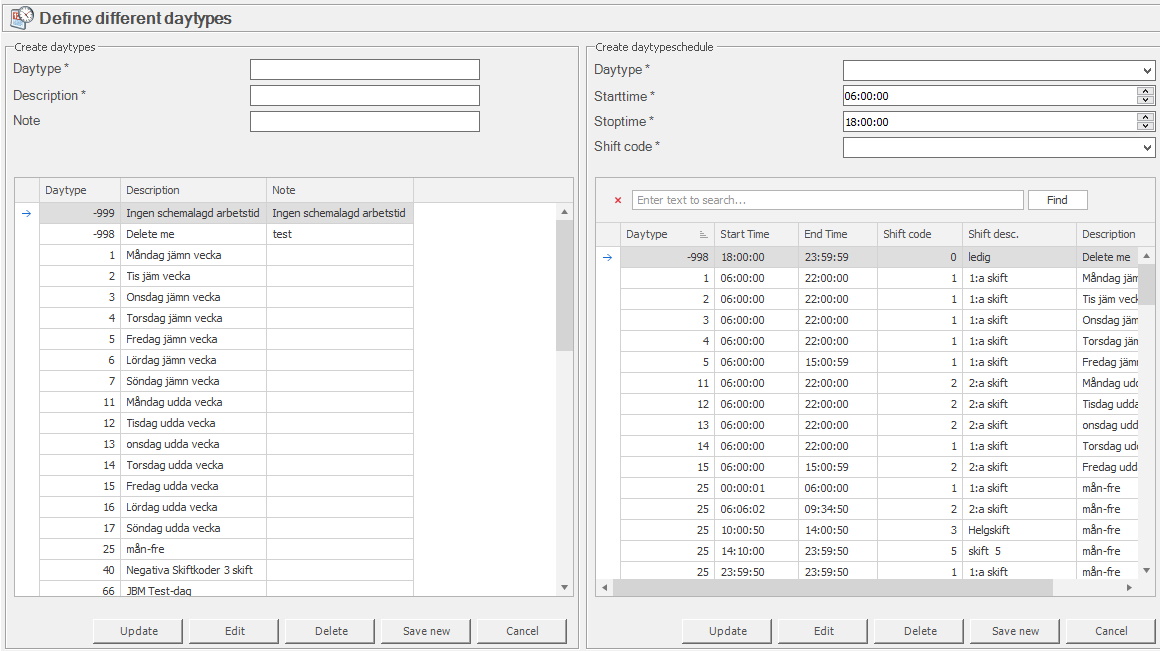
2. Once that is done you have to add the day types the calendar will exist of. This is done via "Client" -> "Administration" -> "System settings" -> "Calendar" -> "Daytype". Here there is more information about how that is done. Usually it is Monday - Friday, but it can also be different shift types, weekends etc.
3. Once daytypes is entered, go back to "Create calendar" to extend it. Select the calendar in the drop-down menu for "Calender", then select the corresponding "Calendar Template". When selecting "From/To Date", remeber that a calendar HAS TO start on a Monday, and it is preferred it ends on a Sunday. Confirm with "Save new", then select the calendar in the list below, and click on "Show" to see the extended calendar.
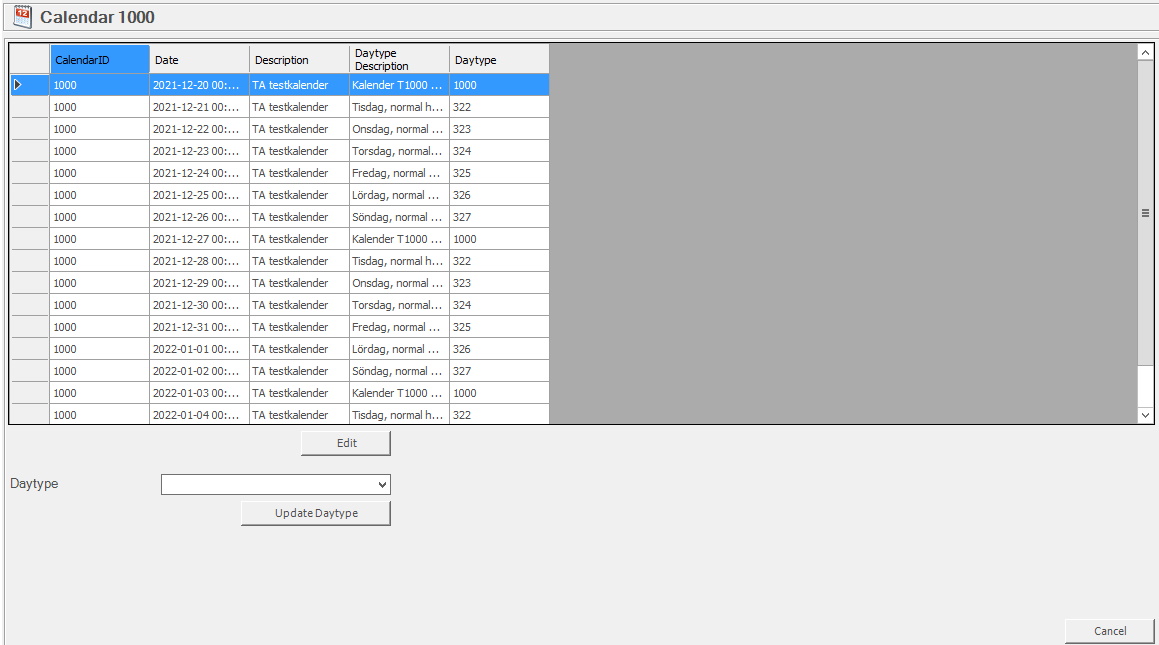
4. An example of an extend calendar is seen below.
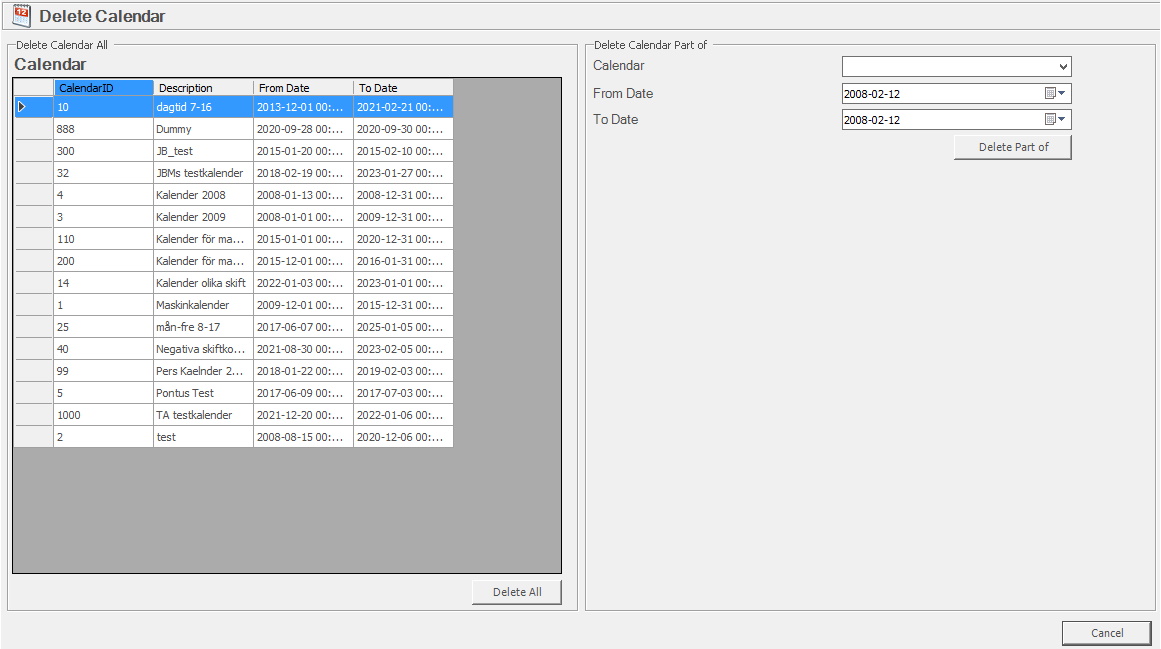
5. When the extended calendar is examined, and it is discovered that the definition of the extension is wrong, this has to be fixed. For example, if a calendar is extended to 04/07/23 this has to be changed to 04/02/23. This is because a calendar HAS TO start on a Monday, and it is recommended that it ends on a Sunday. So the last days between April 7 to April 2 has to be removed. This is done via "Delete calendar", and here there is more information about how that form works.
When you go to that form, select the calendar you wish to change in "Calendar", and the dates in "From/To Date". To confirm this press "Delete Part of". When the changes are done, go back to "Create calendar", and in the right column select the calendar you wish to look at, then press "Show". When the new form appears you will be able to go through the calendar to make sure everything is correct.