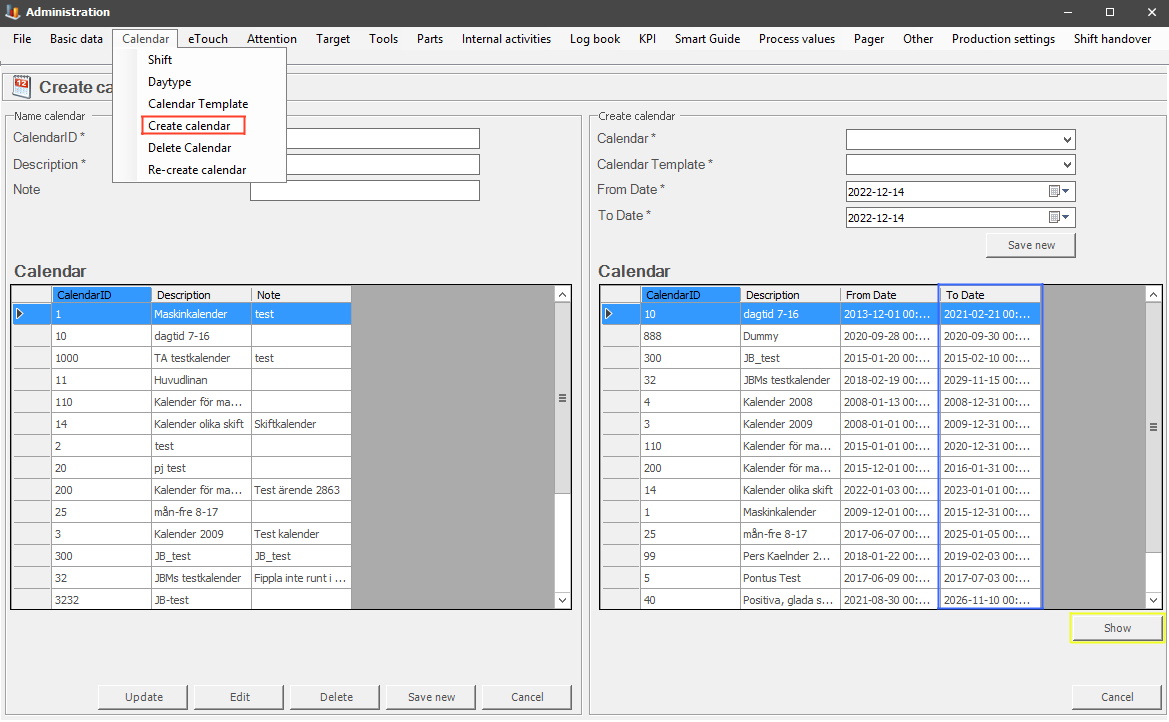
1. To extend an existing calendar go to "Client" -> "Administration" -> "System settings" -> "Calendar" -> "Create Calendar", see the red box. Here there is more information on how this form works.
Once in this form, the next step is to check which calendar/s which will soon expire, see the blue box. Select the calendar to edit in that blue box, then confirm that choice with the Show button, see the yellow box.
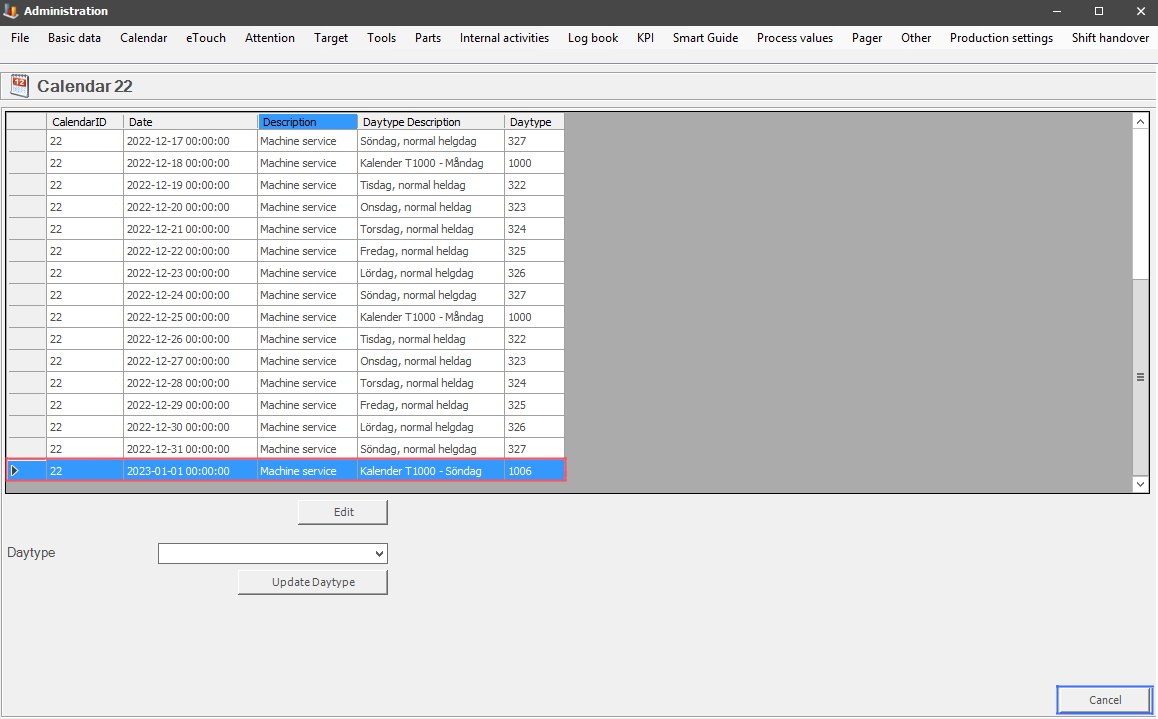
2. A new form will appear once the Show button is activated. It will display the selected calendar, as seen below. Scroll down to the last day of the calandar, see the red box. Confirm that the calendar ends on the correct day, which is a Sunday, which it does in this example. Once this is checked, use the "Cancel" button to return to the Create calendar form.
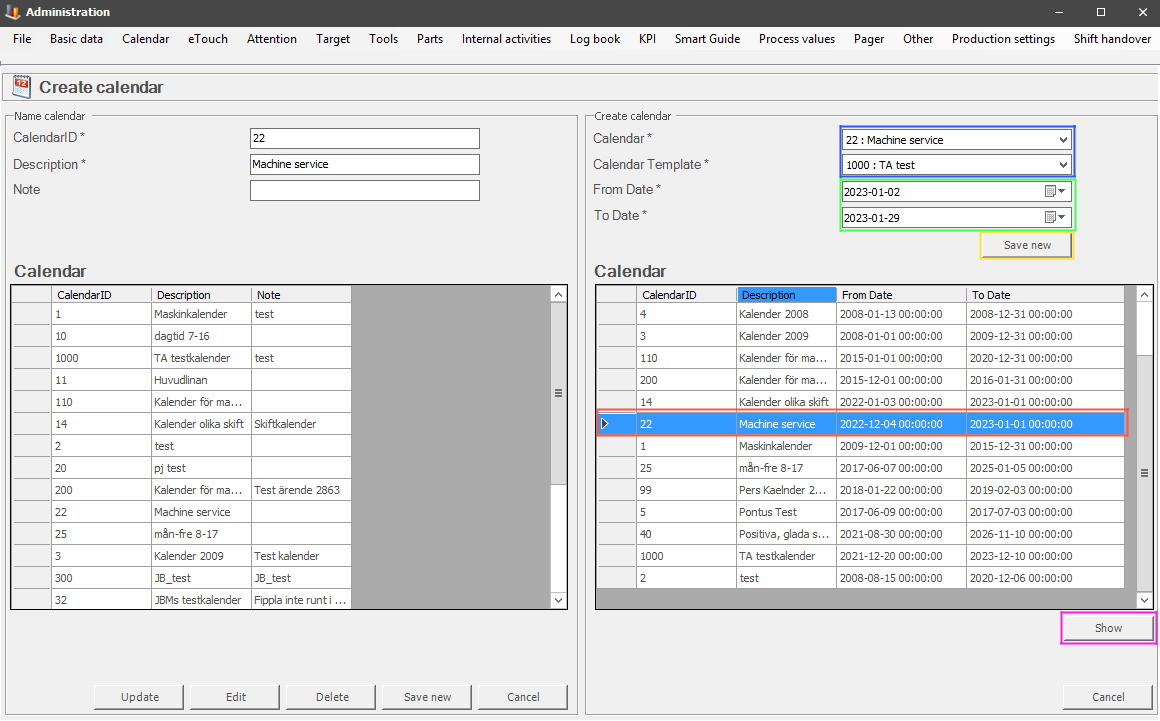
3. Once back to the Create calendar form it is time to extend the calendar. In this example it will be extended a month, from Monday 2023/01/02 - 2023/01/29 since it has to end on a Sunday. In the red box the correct calendar has been selected. In the blue box the correct calendar, and the correct calendar template has been selected. Most of the time the Calendar/Calendar Template will have the same name, but as seen below, that is not mandatory. To learn more about how Calendar Templates work go to "Client" -> "Administration" -> "System settings" -> "Calendar" -> "Calendar Template". Here there is more information on how that form works.
In the green box the correct dates for the extension of the calendar has been selected. To confirm the extension of the calendar click on the Save new button, see the yellow box. To make sure everything is correct click on the Show button to see the result, see the purple box.
4 In the case that an error happens, for example the calendar is extended with the wrong dates, this final part will go through how to fix that. First go to "Client" -> "Administration" -> "System settings" -> "Calendar" -> "Delete Calendar", see the red box. Here there is more information on how this form works.
Once there select the correct calendar in the menu called Calendar, see the blue box. The next step is to remove the wrong dates from the selected calendar, see the pink box. For example, if a calendar ends on a Wednesday one week to late 2022-12-14, but the Calendar Template ends on a Sunday, 2022-12-14. Then a part of this calendar must be removed. The new From date will be the start date for the week that was wrong, according to this example 2022-12-12. The new To date will be 2022-12-14, and then click on the button, Delete part of, to confirm this, see the green box.
