From version 23.6.0 there is a new combination of columns that can be added to the Overview of the Client via the Customization menu. That is "P%WOCR", and "P% without cavity reduction, color". The P% part is connected to APQ - OEE values . Here is more information on how OEE works. If any more information/help is required, then contact Delacroys support.
OEE consists of three parts, A = Availability, P = Performance, and Q = Quality.
These parameters all affect the final OEE number in their own way, as shown below.
[A]vailability: This is measured as part of the planned production time that the machine was running. The remaining time is various types of stops, either scheduled or not scheduled. The result is shown in % - percentage -.
[P] erformance: This takes into account slow cycles, stops, unforeseen breaks, etc.
[Q]uality: The quality yielded over time, it is measured as the percentage of good quantity in relation to the number of produced quantities.
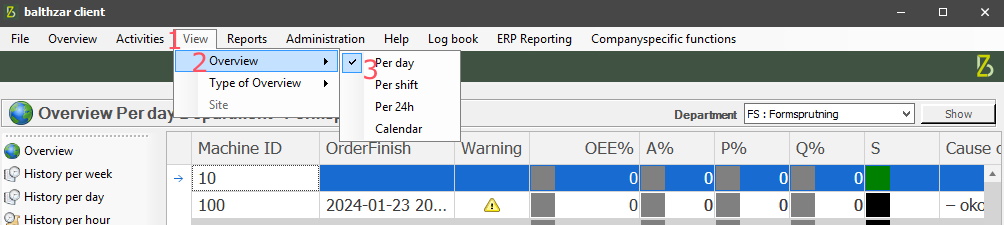
The P% is the performance part, and WOCR is based on the selected Overview in the Client. Via "Client" -> "View" Overview" -> "Own overviews" as seen in the picture below.
It is important to know that the type of Overview selected will affect the result even if the values are the same. The values in question are entered via "Client" -> "Administration" -> "System settings" -> "Basic data" -> "Machines" -> "Machine parameters 4" -> "Speed deviation Green/Yellow limit". If multiple Overviews are used, for example, "Per day", and "Per shift", then the result seen in the different Overviews can differ because of the different intervals.
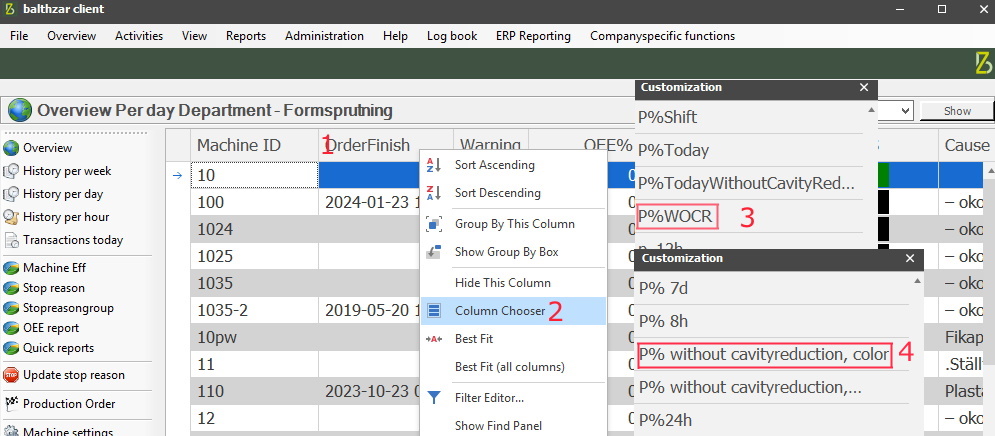
Once a type of Overview is selected, follow the steps in the picture below to add the "P%WOCR" column to the Overview. First right-click on a column header, see 1, second select the column chooser, see 2, then in the new Customization menu select "P%WOCR", and "P% without cavity reduction, color" see 3, and 4.
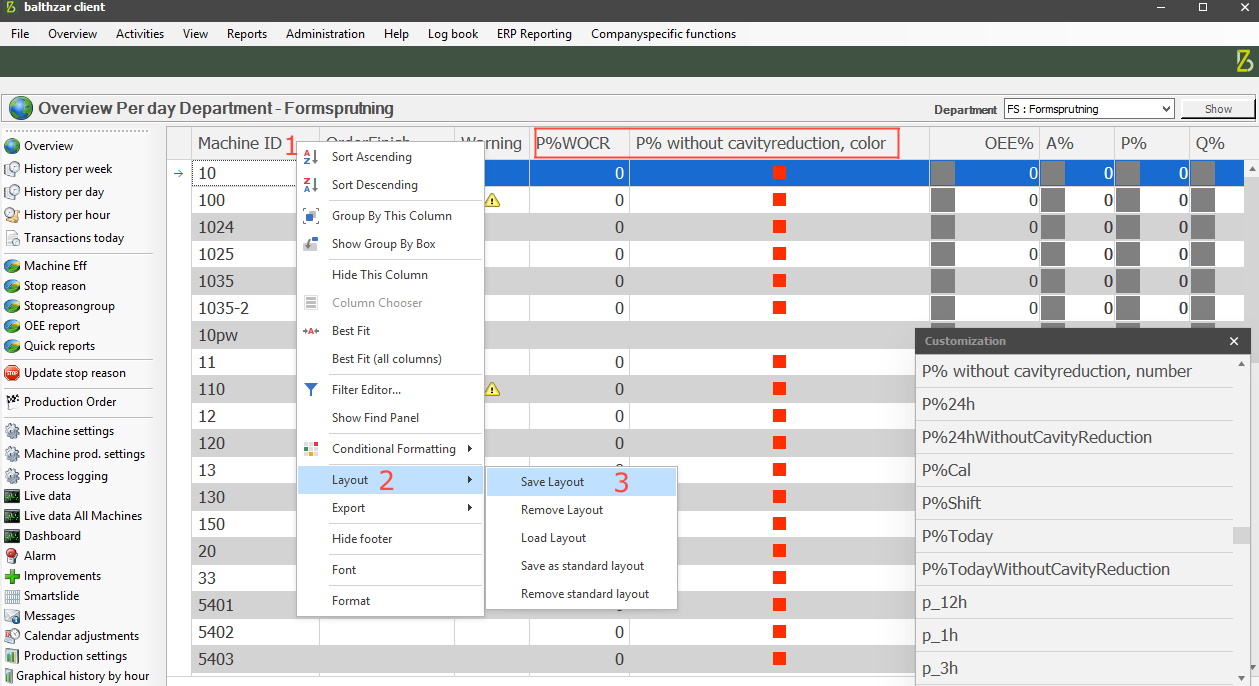
When the new columns are added to the Overview of the Client, it is time to save the new Layout of the Overview of the Client. Right-click on a column header, see 1 in the picture below. Then go to the menu called Layout, see 2. Then select Save Layout, see 3. Now the new Layout of the Overview of the Client will be saved on the currently logged in user.
However, if that user has multiple accounts, for example, the user might have different accounts for different languages then the current user must log out. Then log in again with the other account you wish to save the new Layout on, then go to Layout - Load Layout. In the list that appears select the Layout, then go to Layout - Save as standard layout. Once that is done the Layout will be visible the next time the user logs in to the Client.
To see any data in the two new columns go to "Client" -> "Administration" -> "System settings" -> "Basic data" -> "Machines" -> "Machine Parameters 4" ->"Speed deviation green/yellow limit".
This is found via the admin section in the Client, see 1 in the picture below. Then go to the menu called "Basic data", in there select the menu called "Machines", see 2. Select tab number 4 in the menu for machines, see 3. Then enter the values needed in the fields for Speed deviation green/yellow limit, see 4 and 5.
