This step by step guide will show how the different parts of the documents section in the Client works togheter, when uploading documents to eTouch. In this example documents in PDF formats, that contains plans will be uploaded via Manually linked documents, to the locally saved folder via Server document folders.
The first step is to create the base folder from where the system can find the documents, the second step is to upload the individual document to that specific folder.
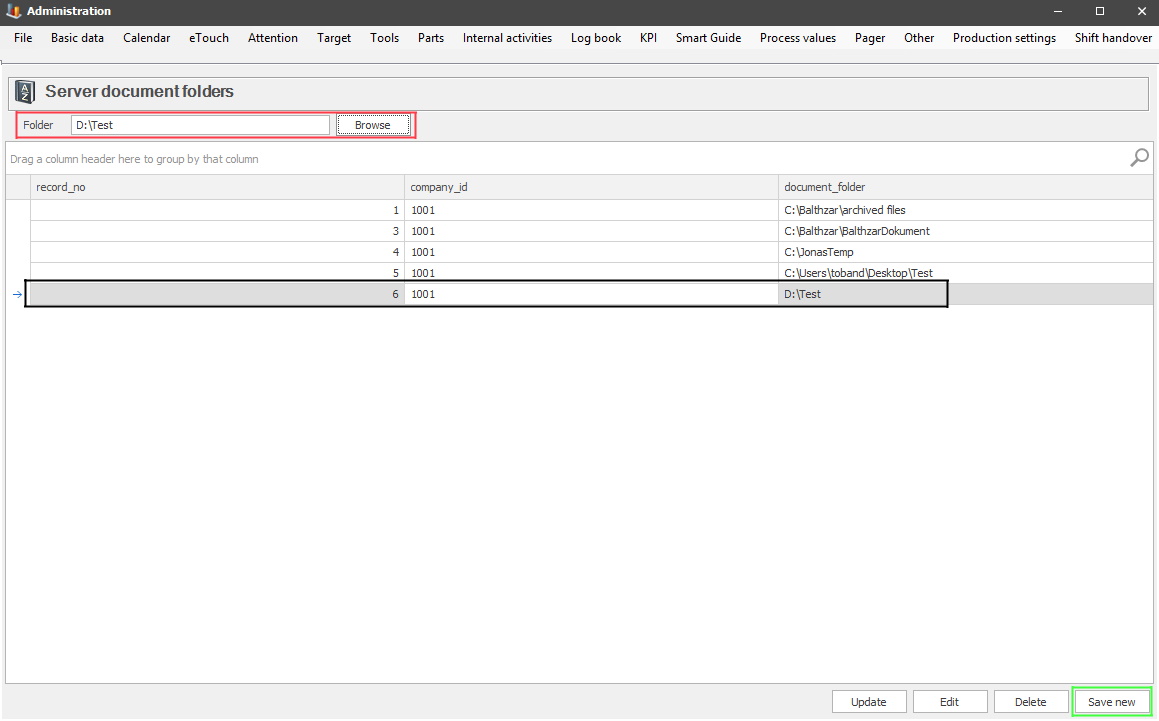
In the red box the search path to the folder is visible. Use the "Save new" button, the green box, to save it. Once that is done it will appear in the list in the form below, see the black box. Now that the folder is created, it is time to go to Manually linked documents, and upload the specific file to this folder.
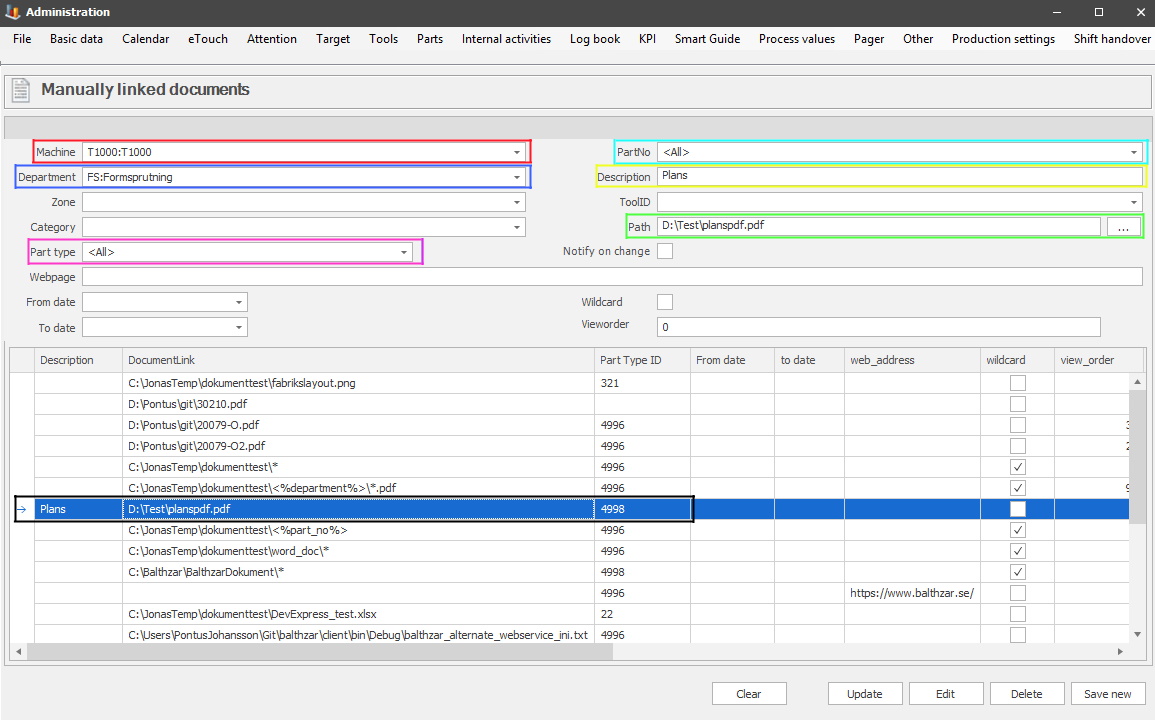
Once the folder in which the documents will be saved is uploaded, then it is time to upload the specific document. This is done via Manually linked documents, as seen above. In our example the document will be uploaded to a specific machine that exists in a specific department, see the red, and blue boxes.
For part types/no select all, see the pink, and the turquoise boxes. The yellow box will show the description of the file. The green box will show the search path to the file. Once this is done, the file will be visible in the list, as seen in the black box.
To see documents in eTouch, that specific menu has to be activated. This is done via "Client" -> "Administration" -> "System settings" -> "eTouch" -> "Define eTouch menu". Here there is more information on how this form works. In that menu activate the menu called Documents.
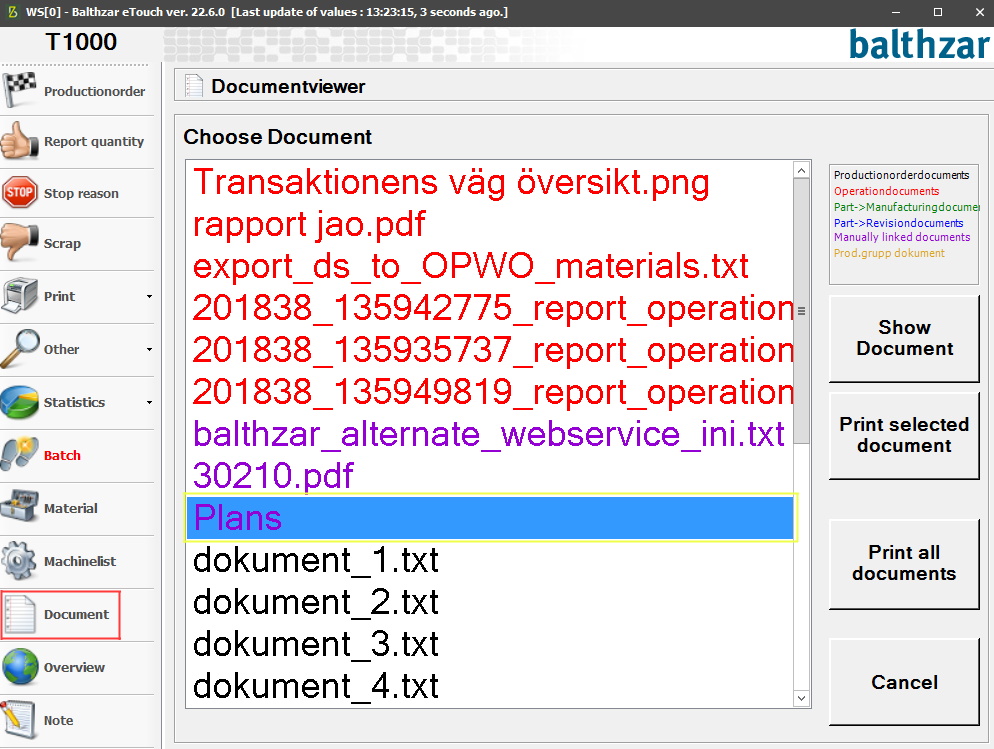
Once that is done go back to eTouch, and it will look like above. The red box is where the Documents menu is located in eTouch. The yellow box shows the document that was uploaded via Manually linked documents.