This step-by-step guide will focus on how to create a flow chart in Internal activities. In this scenario we will focus on how to maintain high quality throughout the entire production chain. When an operator is starting a work order in either Client or eTouch three activities will be created to make sure the quality is maintained. One event to check the quality when starting the work order, one event to check the quality when approving the first piece control, finally one event to check the quality when the work order is finished.
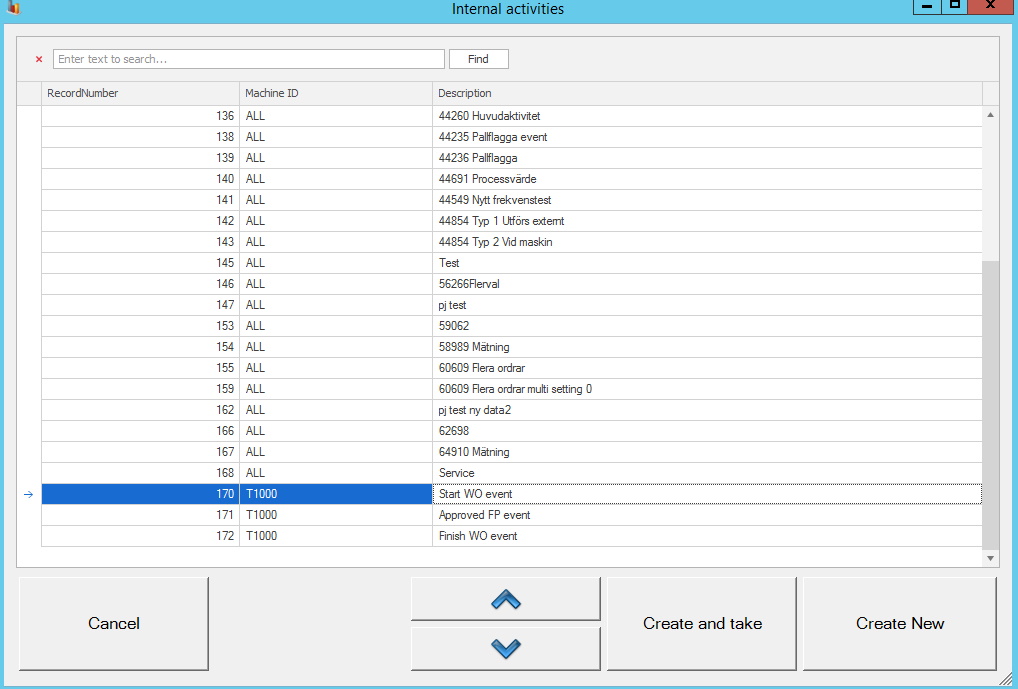
1. To create the three activities for this event go to "Client" -> "Administration" -> "System settings" -> "Internal activities" -> "Action" -> "Activities". Here there is more information about how this form works.
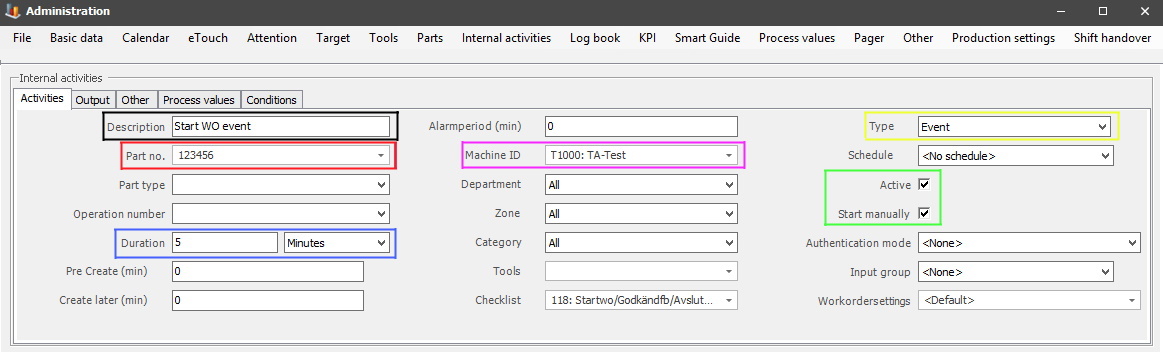
The same settings, seen in the picture above, will be used for all three activities. The only thing that will change is the black box where the description will be Start WO event/Approve First Piece event/Finished WO event. In the red box is the selected part number. In the blue box the amount of time in minutes that the Internal activity will be active.
In this scenario, a specific machine is selected in the pink box, if needed one or more machines can be used, as well as departments/zones/categories. The type of this activity is selected in the yellow box. Finally, the green box shows that this activity has to have both the tick boxes for "Active", and "Start manually" activated. This will ensure that the activity can be started in both Client and eTouch.
2. Once the activities are created go to "Client" -> "Administration" -> "System settings" -> "Internal activities" -> "Events". In this form, the three corresponding events will be created. Here there is more information on how that form works.
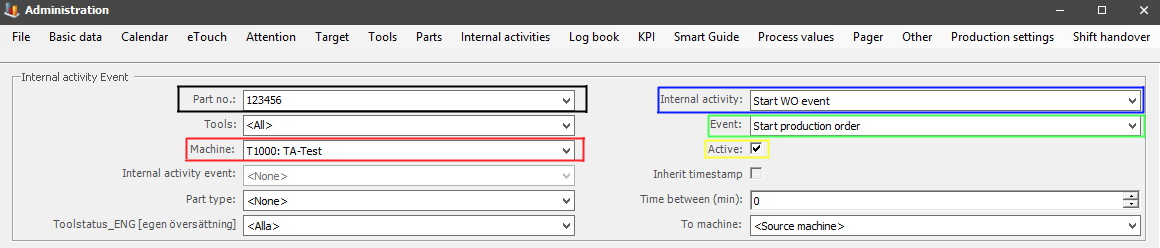
In the black box enter the same part number as the previous activity had. In the red box select the same machine as the previous activity has. In the blue box you select the internal activity the event will be based on. This will correspond to the previous selections in the activities tab.
In our scenario that is "Start WO event", "Approve First Piece event", and "Finished WO event". In the green box, you select the corresponding event that matches the selected internal activity. For the "Start WO event" pick "Start production order". For the "Approve First Piece event" pick the "First Piece OK" event. Finally for the "Finished WO event" you pick the "Stop production order" event. Also do not forget to activate the tick box for "Active", seen in the yellow box.
3. Now that the activities, and the events are created go to "Client" -> "Administration" -> "System settings" -> "Internal activities" -> "Checklist". Here there is more information about how that form works.
In the black box, you enter the name for the Checklist you wish
to create, then click on "Save as". Or pick one of the existing checklists
in the drop-down menu. The tab basic data will
define what questions the Checklist should consist of, which type of answers the user is expected to
give, and it is also here you can select which, if any, PDF Files
to
connect to the
Checklist.
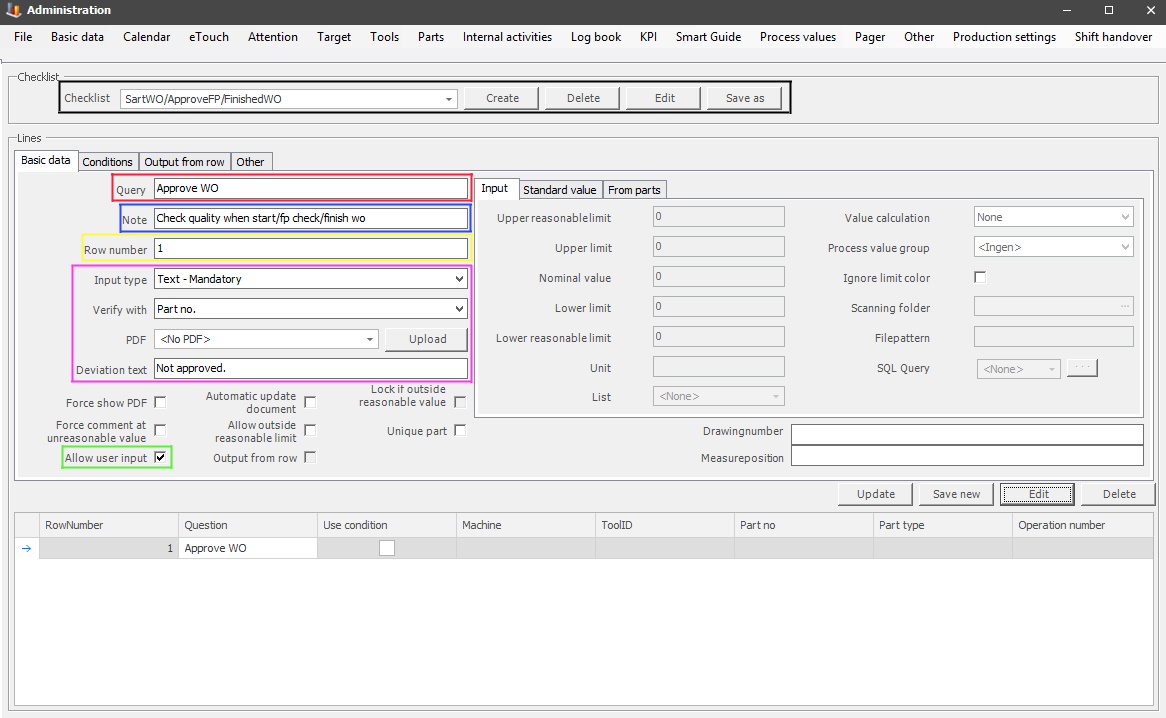
In our scenario, the query in the red box is connected to the previously created activities. The blue box contains additional information about the query. The yellow box will show the order the query is asked in. The pink box will show that the type of input is text - mandatory, this is to make sure the operator has to write an answer to confirm that the activity/quality is approved before moving on.
It also has to be verified against the same part number the activities were created with. No PDF documents are used in this scenario. The deviation text is intended to use as additional information to further improve the quality check. Since the input type is text the tick box "Allow user input" has to be activated as well.
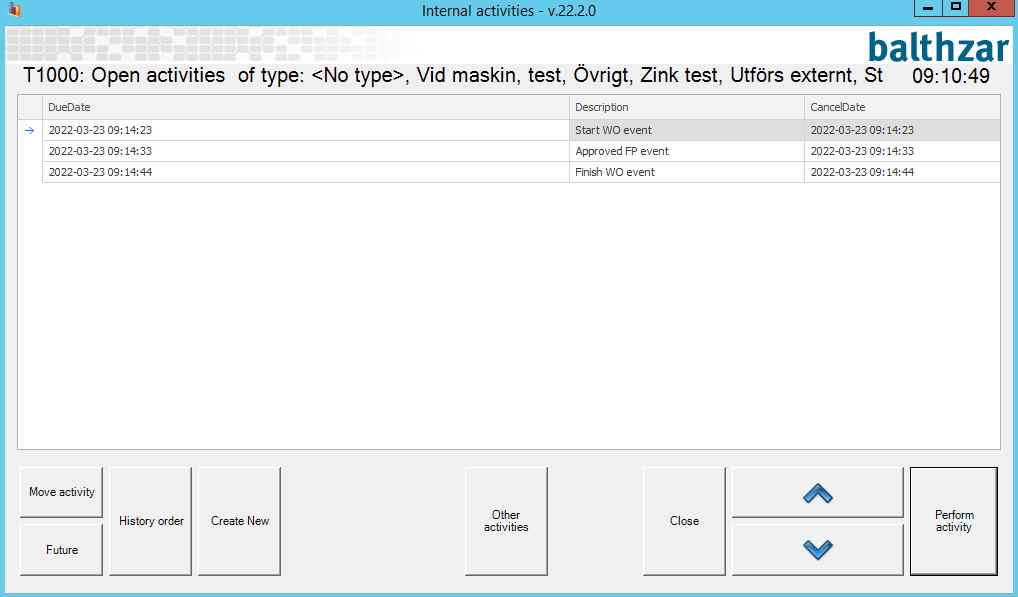
4. Once the activities, the events, and the checklist are all created it is time to start Internal activities in either Client and/or eTouch depending on what you use. If you start it in Client, it is found in the left side menu in IA Machines, and here there is more information on how that works.
If eTouch is used the special function 32 Internal activities have to be activated. Here there is more information on how that works. Once that is activated two new menus will appear in the main menu of eTouch. One is called IA Create, and one is called Activities. The forms in Client/eTouch will look the same. However, in eTouch, you first go to IA Create to create the activities, then go to Activities to perform them.
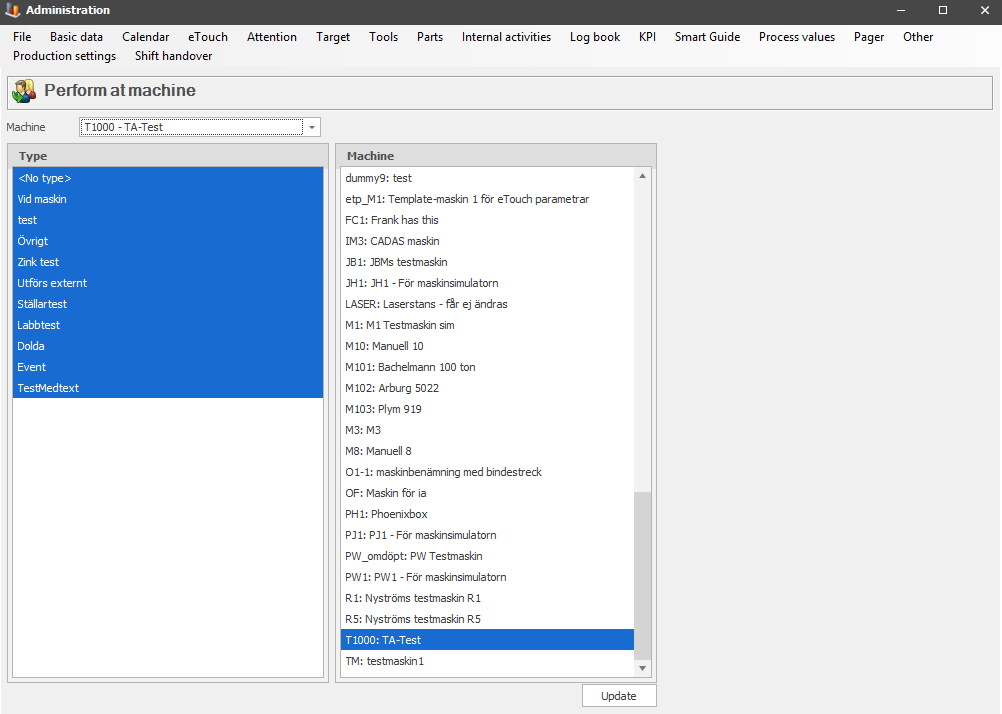
5. If any/all activities in eTouch/Client that are created are not activated correctly when you are in the forms above, then go to "Client" -> "Administration" -> "System settings" -> "Internal activities" -> "Perform at machine". Here you can add/remove any/all types that should be performed at a specific machine/s. Here there is more information on how that form works. To add/edit types in Internal activities go to "Client" -> "Administration" -> "System settings" -> "Internal activities" -> "Type". Here there is more information on how that form works.